Complete Guide: openmediavault 安装nextcloud from Scratch
If you’ve got been trying to find a easy but effective way to build your very own cloud storage gadget, the mixture of OpenMediaVault and Nextcloud is your solution. This manual will stroll you via the whole openmediavault 安装nextcloud procedure, from installing Docker to configuring your secure cloud server.
What is openmediavault 安装nextcloud All About?
Let’s smash down what this setup gives:
- OpenMediaVault (OMV): A loose and sturdy NAS (Network Attached Storage) machine based totally on Debian Linux. It’s lightweight, modular, and ideal for domestic server setups.
- Nextcloud: An open-supply self-hosted cloud answer. Think of it as your personal Google Drive, Dropbox, or OneDrive—completely below your manage.
When you integrate the 2 through Docker, the result is a private, steady, and customizable cloud garage solution. That’s what openmediavault 安装nextcloud is all about.
Requirements Before You Begin
Hardware:
- A computer or Raspberry Pi with OMV mounted
- At least sixteen GB unfastened storage
- Stable nearby network get entry to
Software:
- OpenMediaVault hooked up
- OMV-Extras plugin
- Docker & Portainer (set up via OMV-Extras)
- Web browser to get admission to the interface
Step 1: Install OMV-Extras
To start the openmediavault 安装nextcloud journey, you’ll need the OMV-Extras plugin:
- Log in to the OMV internet UI.
- Go to the Plugins phase.
- Search for openmediavault-omvextrasorg and installation it.
- Refresh the web page to get entry to the brand new OMV-Extras menu.
Step 2: Install Docker and Portainer
- Navigate to the OMV-Extras tab.
- Click Install Docker.
- After Docker installs, click on Install Portainer for box management.
Portainer helps you to manipulate Docker packing containers through a browser—critical for managing Nextcloud without difficulty.
You may also like: How to Utilize Xemiwikhiz5654: A Beginner’s Ultimate Guide
Step 3: Set Up Persistent Storage Volumes
In Portainer:
Go to Volumes → Add Volume.
Create:
nextcloud_data
nextcloud_db
These volumes will shop files and database records so not anything is misplaced at some stage in updates.
Step 4: Deploy the MariaDB Container
Nextcloud needs a database. Here’s how to installation MariaDB:
- Go to Containers → Add Container
- Name: nextcloud_db
- Image: mariadb:modern
- Environment variables:
- MYSQL_ROOT_PASSWORD=your_root_password
- MYSQL_DATABASE=nextcloud
- MYSQL_USER=nextcloud
- MYSQL_PASSWORD=your_db_password
- Volume: /var/lib/mysql mapped to nextcloud_db
- Click Deploy the box.
Step 5: Deploy the Nextcloud Container
Now install the main application:
- Add new container:
- Name: nextcloud
- Image: nextcloud:present day
- Port: Map 8080 (host) → 80 (box)
- Volume: /var/www/html mapped to nextcloud_data
- Deploy the box.
- This finishes the center a part of openmediavault 安装nextcloud.
Step 6: Complete the Web Setup
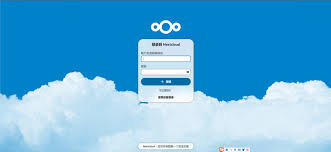
Visit: http://<your-OMV-IP>:8080
- On the setup display:
- Create an admin username and password
- Leave the information folder as default
- For database settings:
- Type: MySQL/MariaDB
- User: nextcloud
- Password: your_db_password
- DB name: nextcloud
- Host: nextcloud_db
- Click Finish Setup. Your private cloud will initialize in a few minutes.
Step 7: Secure Your Server with HTTPS (Optional)
Using Nginx Proxy Manager:
- Deploy Nginx Proxy Manager via Docker
- Route in your Nextcloud field on port 8080
- Request a Let’s Encrypt SSL certificates
- Manual SSL Configuration (Advanced):
If you’re cushty with Linux and DNS, use Certbot and a opposite proxy to configure SSL manually.
Step 8: Access Nextcloud from Any Device
Nextcloud helps:
- Windows/macOS/Linux clients
- Android and iOS apps
- Browser-based interface
- Just point your apps in your OMV server’s IP or area and log in.
Step 9: Install Useful Plugins
Nextcloud has masses of powerful plugins. Some necessities:
- Calendar & Contacts: For syncing your schedules and deal with books
- Tasks: For to-dos and reminders
- OnlyOffice: For actual-time file editing
- Photos: For photograph garage and viewing
- Mail: A built-in e-mail consumer
Enable them through the Apps section for your Nextcloud dashboard.
Step 10: Backups and Performance Tips
To guard your facts and optimize overall performance:
- Backups:
- Use Rsync or Docker quantity snapshots often.
- Backup database one after the other if wanted.
- Performance:
- Enable Redis or APCu caching
- Use SSDs for faster get right of entry to
- Limit document sizes if on a Raspberry Pi
- Troubleshooting Common Issues
- Nextcloud Won’t Load?
- Ensure each containers (Nextcloud and MariaDB) are strolling.
- Check your port mappings.
- Database Connection Error?
- Verify credentials and box name (nextcloud_db).
- Check logs in Portainer.
- Updates Break Something?
- Always backup earlier than updating Docker pics.
- Use the equal volumes all through redeployment to retain facts.
Main Takeaways
The method of openmediavault 安装nextcloud may also appear technical before everything look, but it is especially attainable even for beginners. Here’s what you ought to take into account:
- OpenMediaVault makes NAS deployment smooth, particularly with Docker and Portainer integration.
- Nextcloud is a effective personal cloud platform, supplying the entirety from file garage to full productiveness equipment.
- Using Docker boxes keeps matters modular, letting you manipulate and update Nextcloud and its database one by one.
- Security is critical—don’t pass SSL setup and habitual backups.
- This setup is scalable—you could run it on a Raspberry Pi, an antique PC, or maybe a committed server.
With this guide, you’ve taken a large step toward whole facts privacy and manage. You now have your personal private cloud, equipped to serve you from anywhere inside the global.


Post Comment